Showing posts with label pinterest. Show all posts

April 02, 2013

Free Printables


I wanted to share some printables I made for my daughter's room. All you have to do is click the link, click the 'Options' button at the top right hand corner of the picture, and hit 'Download'
They're not perfect, but they're something! Enjoy!!

{download for free here}

February 25, 2013

Bestie Mugs


When I moved, I left behind my daughter's Godmother and one of my best friends. I've really been missing her lately. I've had this little gift idea in my head for a while and figured what better time than Valentine's day to send it to her! And in case you're wondering I kept the AZ mug for myself and sent the WV one to her. I apologize in advance for my lack of pictures.

What you need
  • 2 microwave and oven safe mugs, any color
  • Ceramic pen
  • Rubbing alcohol or nail polish remover (to erase mistakes)
  • Outline of states
  • Tape
  • Sealer/Sealant
*Please note that using a Sharpie will not work. You can bake it at any temperature for any amount of time and it will still come off. If you want to decorate a dish for decor purposes only, a Sharpie will work great! If you actually want to use your decorated dish you need a ceramic marker.

1. Print and cut state outlines. Tape to mugs.
2. Trace around states with marker.
3. Peel off paper states and mark city with a heart.
4. Write out verse (below). This step is optional.
5. I added a few extra touches to the handles and base of the mug. This is also optional. Let your creativity run free!
6. Finish off with sealant to keep the ink from wiping off. (At least, that's what the craft store employee told me)

Let me just say that I searched for a good ceramic pen, but I couldn't find one. When I asked a store employee I was led to a package of white markers with colored caps that looked like the cheap markers you let your kid play with. And they were cheap. I also bought the sealant I was told about to make sure that the ink wouldn't come off. Since I had already decorated the mugs with Sharpie (even baked it on) I tested the 'ceramic marker' on the bottom of the mug before starting my decorating from scratch. It wrote horribly and smeared. I even put the sealer on  it and it made it worse! To top it off, there were no directions on the marker case or sealant bottle that said how to make this permanent. Do I bake it? I still don't know. So, I left my baked Sharpie art on the mugs, put the sealant over that, and let it air dry. Just to be on the safe side I made sure I didn't decorate and seal anywhere on the mug that would come in contact with my mouth because I also couldn't find any label on the products that said 'toxic' or 'non-toxic'. I'm hoping this helps keep the decoration on the mug longer, but only time will tell! Make sure you hand-wash this to make it last as long as possible. Again, I'm so sorry for my lack of pictures and product knowledge. But I just thought this was too great of an idea not to share!

January 14, 2013

Fabric Letters


I was browsing some local shops downtown and fell in love with the cutest plushy letters, but I didn't love the $30 price tag (that's per letter)! Upon further inspection I could tell it was a cardboard letter in disguise. Immediately I thought to myself, "I can make this for way cheaper!" So when we got home Pinterest had read my mind and showed me this perfect tutorial.

Mine are made a little differently. here's how! In case you were wondering, I bought my cardboard letters from a store called Crafts2000 for about $1 each, but I'm sure you could find them at any craft store (although I couldn't, thank you small town).


Here's what you'll need:
  • Scissors
  • Pinking Shears (optional)
  • Hot Glue Gun
  • Glue Sticks
  • Stuffing
  • Cardboard Letter(s)
  • Fabric (fat quarters or scraps)
  • Scraps of Cardboard (like a cereal box) or Cardstock

First lay out your fabric with the printed side down. Lay your letter down and trace an outline about 1/2"-3/4" around it with a pencil.


Cut the outline out using pinking shears so the edges don't fray. This will make it easier to glue later.


Hot glue the fabric to the side of the letter. I learned from experience not to glue the fabric to the face of the letter, it gets bumpy.


Repeat steps one and two for the other side. Start gluing stuffing to the front of the letter until its covered.


Begin gluing your fabric down in small sections while tucking the stuffing in. This part was tricky, especially when it came to the hole in the 'P'


Once that was finished I used some scrap cardboard (in my case, a Ritz cracker box and the cardboard from my fat quarters) and cut pieces to fit each side. I could've done it all as once piece, but I wanted my corners to be crisp and not rounded.


Lay your fabric print side down and laid out my cardboard pieces. Be cautious of where seams will show. When I say seams, I mean that the fabric probably won't be long enough to place all the cardboard in one strip so that there is only one seam (where one end meets the other on the letter). For instance, you don't want a seam along the curve of the 'P'


Cut the fabric, leaving about a 1/2"-3/4" edge, and begin gluing to the cardboard strips.


Once that is done just simply glue the strips along the sides of the letter and wha-la!


I know they're not perfect, but I saved about $50 by making these myself instead of buying them. I can't wait to put them in Aubrey's room! I just need to do a 'J' since the craft store was out.

front
back: notice the 'A' has dimples in it, that's why you don't hot glue the fabric.
Happy Crafting!

January 07, 2013

Matching Pinterest Board Covers


My need to have things organized and matching has gotten the best of me. I felt like my pin boards had gotten very cluttered. I look at the pictures rather than the small text above my boards to know whats in there, that's just how my brain works. I frequently refer to my boards for tips, tricks, and how-to's. So being able to find what I need quickly is a must, especially when you only have 30 minutes to get it done before your baby starts crying for you!

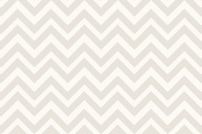
To start I Googled a large pattern that I liked (for me it was chevron). I saved it to my desktop and opened it in Adobe Photoshop (here comes the hardest part). If you don't have Adobe Photoshop stay tuned below, you can download the chevron board cover and use Paint to add text.


Then in the top tool bar select "Image." In the drop down menu that appears selects "Canvas Size." Re-size the canvas to be 202 pixels in width by 134 pixels in height. Make sure that you have selected "pixels" and not "inches" or any other form of measurement. Hit OK.


Then a window will pop up telling you that clipping will occur. This is okay, select "Proceed."


Your image should now be this size. Hardest part over. Phew!


Select the Horizontal Type Tool (T) or the text tool and select the are you want your text in. You can also select the font and font size you'd like. I used Times New Roman in font size 36 pt.


Select the Move Tool (V) and move your text until it is centered on your image.


Now save your image. To do this select "File" in the top tool bar. In the drop down menu select "Save As." In the window that pops up type in your "File Name" and make sure to change the "Format" to JPEG. Now Save.


If you don't have Adobe Photoshop you can download the re-sized image below. Then open the image in Paint, like so. Select the text button and select the area you want to place your text. If you have Adobe Photoshop, skip ahead.

{here} gray chevron print background
{here} green paisley print background


Here you can select your font style and size. I used Times New Roman in font size 20.

Move your mouse over the left hand corner of your selected area. An arrow should appear, click and hold your mouse button while moving the box diagonally down. This will move your text into the center. Once this is done, save your image.


Now go to your Pinterest Boards page. If you want to rearrange your boards alphabetically like I did follow these steps. Otherwise, skip ahead.
Next to "Edit Profile" select the button that looks like a board.


Rearrange your boards alphabetically, or as you'd like. When you're done with that make sure you click the red check mark to save your new arrangement!


To add your board cover, click the "Add+" button in the upper right hand corner of your page.


This window will appear. Select "Upload a Pin."


Click the "Browse.." button and select your image. In the drop down menu select the board you want the image to go to. Then click "Pin It." Its the same a when you pin anything to Pinterest, but you're uploading a picture from your computer instead of pinning a page.


Now go back to your Boards page. Move your cursor over the board you just pinned to. A button that says "Edit Board Cover" should appear. Click it. This window will pop up. Click "Set Cover." Although this last step is tedious, you need to do it otherwise the next time you pin something to this board the picture will change.


There you have it! Just change the text for each board. To keep it looking nice when you make a new board, just repeat this process. Its a long tutorial, but its quite simple and quick in reality! It took me maybe 30 minutes total to do all my boards. Now I can see what I'm looking for with ease and it doesn't look cluttered.

I wish there were a way to hide all of these new "pins" on my Pinterest feed for my poor followers sakes! But, there's not, so sorry!


Happy, organized pinning!

December 30, 2012

2013 Home Inspiration

Have you ever had an itch you can't scratch? Lately I've been itching to unpack, have my own place, and decorate. Has it really only been two and a half months since we moved out of our home? It feels like longer. Don't get me wrong, I'm so grateful that we have family we can stay with! Its just not our own space. You try fitting the bare minimum you need for a baby, yourself, and your spouse in one room.

I've been on Pinterest a lot lately, which only makes this itch worse! There are so many beautiful homes and brilliant projects that are just calling my name.

Chevron Pattern Rug
{DIY here}
Striped Curtains
{DIY here}
Upholstered Headboard
{Tutorial here}
Wreath
{From teach. craft. love.}

Pillows
{From Walmart.com}

Wall Color

Pantry Storage
{"Reader Space" from IHeart Organizing}

Double Shower Curtains

Vinyl Kitchen Backsplash
Kitchen backsplash, pantry or bathroom upgrade - vinyl quatrefoil design -
{Landee On Etsy}
I mean, gorgeous, great ideas, right? I'm in love! There's so much more here! Can we have our own home? Please, please, please, please?? I didn't even get to decorate for the holiday season this year. I have a feeling that we have a lot of great changes coming in 2013!

I wish I were more handy with Photoshop, but since I'm not, here's a regular 'ol list of things I'd like to accomplish in our, currently imaginary, home for 2013:

1. Sell Dining Room table set & buy new one.
2. Get rug for family room.
3. Sell Master Bedroom furniture set & buy new one.
4. Re-do Aubrey's room.
5. Buy new pots & pans.
6. Buy new dishes.
7. Buy new washer & dryer.
8. Sell faux leather sofa and buy IKEA Sofa
9. Get new comforter for master bedroom.
10. Buy new entertainment system.

We're not made of money, so I'm determined to find a way to make things happen on a budget. I know its possible!


Happy (almost) New Year!

November 20, 2012

DIY Baby Leggings


I was browsing Pinterest the other evening while my daughter was sleeping and came across this tutorial for baby leggings. I've been inspired lately by some fellow blogging mommies to get super cute baby pants; check them out!

Hanes from Cara Loren!
And this little guy from Small Fry

I just fell in love with the stripes and bold Aztec print! They're so out of the ordinary and precious. I would never wear them, but on a cute little one? Ohhh yes!

I found some discounted fabric at a store called SAS here in Phoenix and knew it was perfect! It cost me a whole 99 cents! Granted, it has a rip in it and isn't very much fabric, but I have a ton left over for other small projects!

So, to make these adorable legging you need:
  • 3/4" Thick Elastic
  • Fabric
  • Scissors
  • Fabric Marker
  • Marker
  • Pins
  • Paper
  • Ruler
  • Lace (optional)
  • Pants that are the size you want to make
 Take your pants, fold them in half, and lay them on the paper(s). Trace around them, leaving a seam allowance. Don't add a seam allowance along the straight edge because this will be where the fabric is folded. I'll get to that in a moment. I also used a very thick elastic, so I added an inch to the top just to make sure I had enough room. If you're using the 3/4" elastic like the tutorial says, your top seam allowance should be 1 1/4 inches. This paper will be your pattern.


Now, fold your fabric and lay the straight edge of the pattern along the fold. Pin in place and mark an outline with the fabric marker onto the fabric. Make sure not to cut along the fold when cutting the fabric!


Cut another piece of fabric the same way. When you unfold the fabric it should look like this. The narrower side is the bottom. When cutting the second piece, make sure that you line up the stripe (or other pattern) to the first piece otherwise the stripes on the pants will end up crooked at the seam.


Turn the pieces over and fold the bottom up 3/4" and pin it in place. I wanted to spice them up a little bit, so I bought this lace for 25 cents per yard at SAS too. Score! Once I had pinned the fabric I flipped it back over to the front, arranged the lace where I wanted it, and re-pinned the fabric with the lace.


This is when I noticed that my fabric wasn't the same on both sides. I had to choose which side was going to be the outside (right side) and inside (wrong side). As you can see, one side has very small stripes outside of the larger stripes and one side does not. I chose the side that didn't have the extra stripes as my "right side."


Next, sew along the bottom edge. I used a zig-zag stitch so that the fabric has more room to stretch. You could also use a double-needle, but I don't have one. My fabric was quite stretchy, so instead of gently pulling the fabric as I sew, I just let it run through without any pulling so the fabric didn't wrinkle and crease. Also, I sewed on the "right side" of my fabric instead of the "wrong side" like you typically do because I wanted to make sure the lace got sewn on properly.


 I was lazy and didn't want to change my thread color. It was black so I thought it wouldn't matter since the pants are striped. Nope! I was so wrong! I had to change my thread to white so it blended with the lace better. The black thread took away from the beautiful lace!


After doing that to both pieces of fabric, place them on top of each other, "right sides" facing each other, and pin. Sew along the upper side slopes. Trim the excess fabric. See the lace? Ahh, so much better!


Fold the fabric the other way, matching up the legs, and pin. Sew along the pinned edge and trim off the excess.

Fold the top edge of the pants down 1 1/4" (or in my case, 2 1/4") and pin in place. Sew along the raw edge (not folded) and leave a 1-2" opening. This is the tube you will thread the elastic through. Thread the elastic through using a safety pin, make sure to leave enough to grab sticking out of both sides.


Sew the two ends of the elastic together using a zig-zag stitch. Make sure the ends overlap. Then pin the hole closed and sew it shut! Try not to sew the elastic to the fabric so it will have room to stretch as much as it needs.


Ta-da! You're done! Just turn them "right side" out. How cute are these? I just love that little bit of lace around the ankles! I can't wait to make more!


How did yours turn out? I'd love to see! Comment with a link to the picture below! :)

Popular Posts